
- CentOS, Genel, Linux, LiteSpeed, Ubuntu, Web Server
- Written by: Minussoft
- Leave a comment
- permalink
6 Steps for Secure Server with LiteSpeed
Hello all system administrators! We are all have some critical web servers to manage. The health and correct operation of these web servers is more important than anything for us.
We telling you that the security rules and firewall in the web server must be configured. If you start work from your web server, you can fix this without straining your hardware devices. Let me show you some tactics.
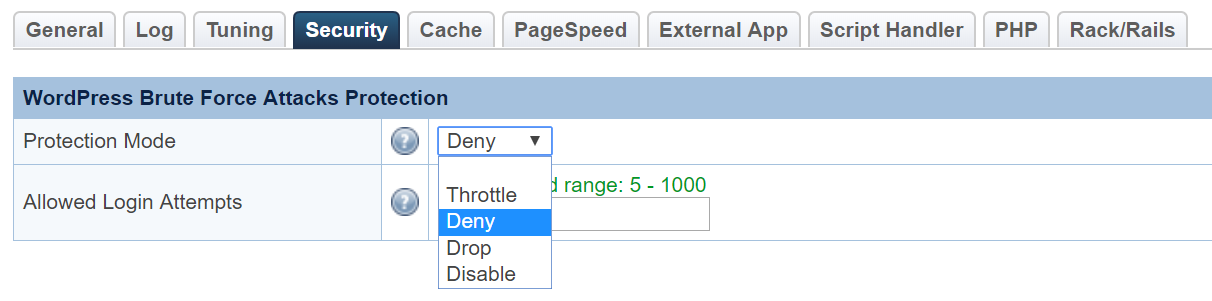
- WordPress Brute Force Attacks Protection (LSWS Web Admin -> Configuration -> Security)
- Protection Modes
- Throttle
- Deny
- Drop
- Allowed Login Attempts (5-1000 Range)
- Protection Modes
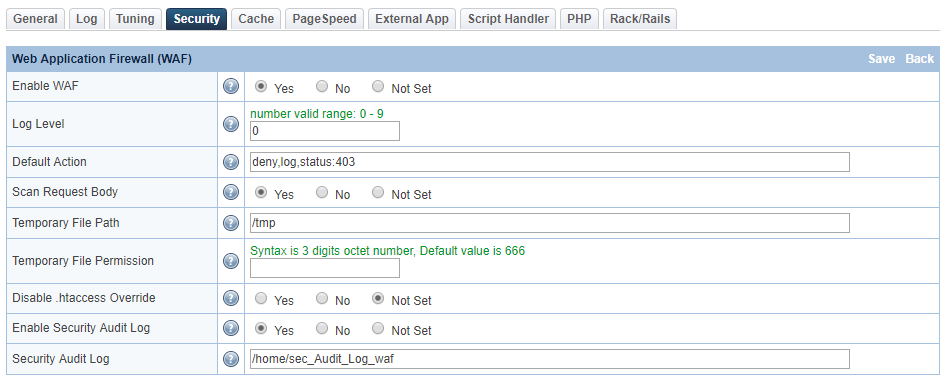
- Web Application Firewall (LSWS Web Admin -> Configuration -> Security)
- Log Level
- Default Action
- Scan Request Body
- TMP File Path
- TMP File Permissions
- Disable .htaccess Override
- Enable Security Audit Log
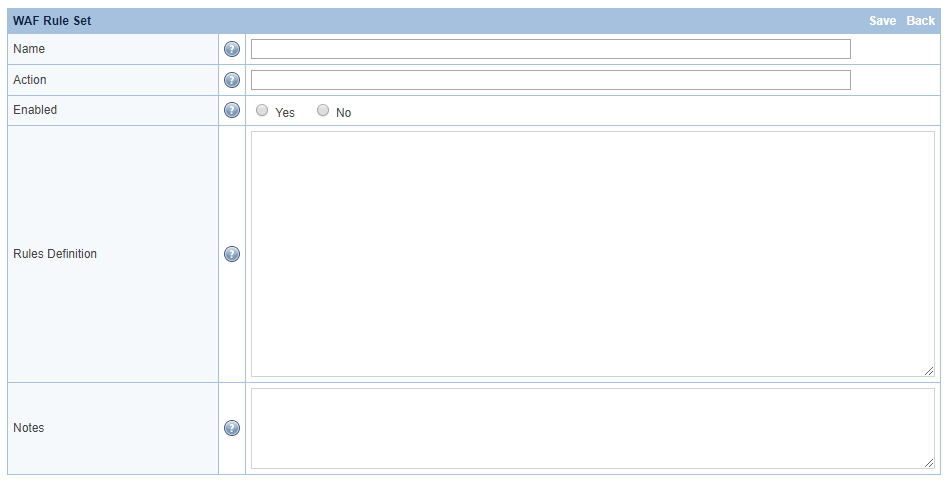
- WAF Ruleset (LSWS Web Admin -> Configuration -> Security)
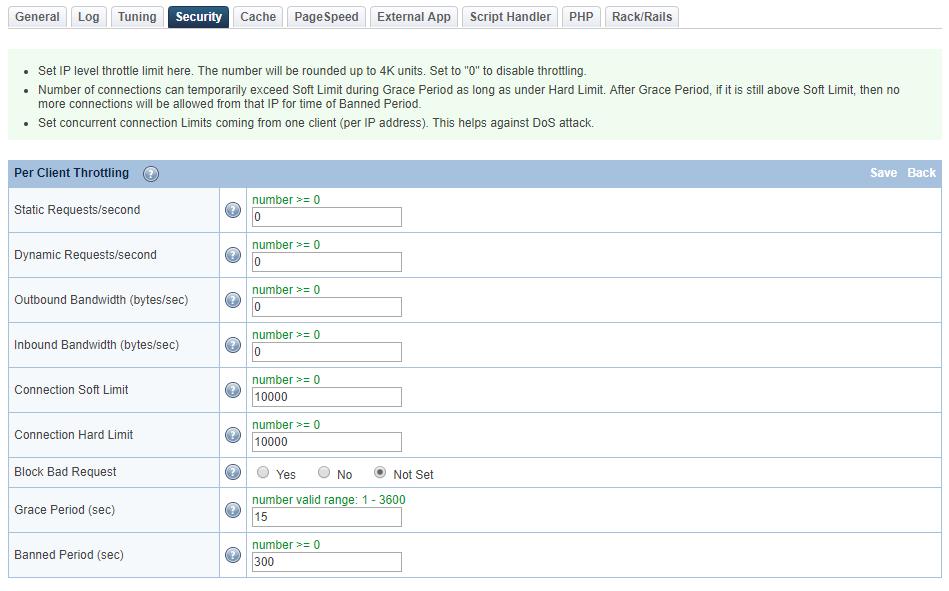
- Per Client Throttling (LSWS Web Admin -> Configuration -> Security)
- Static Request / Second: Specifies the maximum number of requests to static content coming from a single IP address that can be processed in a single second regardless of the number of connections established. When this limit is reached, all future requests are tar-pitted until the next second. Request limits for dynamically generated content are independent of this limit. Per-client request limits can be set at server- or virtual host-level. Virtual host-level settings override server-level settings.
- Dynamic Request / Second: Specifies the maximum number of requests to dynamically generated content coming from a single IP address that can be processed in each second regardless of the number of connections established. When this limit is reached, all future requests to dynamic content are tar-pitted until the next second. The request limit for static content is independent of this limit. This per client request limit can be set at server or virtual host level. Virtual host-level settings override server-level settings.
- Outbound Bandwidth (bytes / sec): The maximum allowed outgoing throughput to a single IP address, regardless of the number of connections established. The real bandwidth may end up being slightly higher than this setting for efficiency reasons. Bandwidth is allocated in 4KB units. Set to 0 to disable throttling. Per-client bandwidth limits (bytes/sec) can be set at the server or virtual host level where virtual host level settings override server level settings.
- Inbound Bandwidth (bytes/sec): The maximum allowed incoming throughput from a single IP address, regardless of the number of connections established. The real bandwidth may end up being slightly higher than this setting for efficiency reasons. Bandwidth is allocated in 1KB units. Set to 0 to disable throttling. Per-client bandwidth limits (bytes/sec) can be set at the server or virtual host level where virtual host level settings override server level settings.
- Connection Soft Limit: Specifies the soft limit of concurrent connections allowed from one IP. This soft limit can be exceeded temporarily during “Grace Period (sec)” as long as the number is below the “Connection Hard Limit”, but Keep-Alive connections will be closed as soon as possible until the number of connections is lower than the limit. If number of connections is still over the limit after the “Grace Period (sec)”, that IP will be blocked for the “Banned Period (sec)”.
- Connection Hard Limit: Specifies the maximum number of allowed concurrent connections from a single IP address. This limit is always enforced and a client will never be able to exceed this limit. HTTP/1.0 clients usually try to set up as many connections as they need to download embedded content at the same time. This limit should be set high enough so that HTTP/1.0 clients can still access the site. Use “Connection Soft Limit” to set the desired connection limit.
- Block Bad Request: Block IPs that keep sending badly-formated HTTP requests for the “Banned Period (sec)”. Default is Yes. This helps to block botnet attacks that repeatedly sending junk requests.
- Grace Period (sec): Specifies how long new connections can be accepted after the number of connections established from one IP is over the “Connection Soft Limit”. Within this period, new connections will be accepted if the total connections is still below the “Connection Hard Limit”. After this period has elapsed, if the number of connections still higher than the “Connection Soft Limit”, then the offending IP will be blocked for the “Banned Period (sec)”.
- Banned Period (sec): Specifies how long new connections will be rejected from an IP if, after the “Grace Period (sec)” has elapsed, the number of connections is still more than the “Connection Soft Limit”. If IPs are getting banned repeatedly, we suggest that you increase your banned period to stiffen the penalty for abuse.
- Access Denied Directories: Specifies directories that should be blocked from access. Add directories that contain sensitive data to this list to prevent accidentally exposing sensitive files to clients. Append a “*” to the path to include all sub-directories. If both “Follow Symbolic Link” and “Check Symbolic Link” are enabled, symbolic links will be checked against the denied directories.
- Access Control: Specifies what sub networks and/or IP addresses can access the server. At the server level, this setting will affect all virtual hosts. You can also set up access control unique to each virtual host at the virtual host level. Virtual host level settings will NOT override server level settings. Blocking/Allowing an IP is determined by the combination of the allowed list and the denied list. If you want to block only certain IPs or sub-networks, put * or ALL in the “Allowed List” and list the blocked IPs or sub-networks in the “Denied List”. If you want to allow only certain IPs or sub-networks, put * or ALL in the “Denied List” and list the allowed IPs or sub-networks in the “Allowed List”. The setting of the smallest scope that fits for an IP will be used to determine access.
-
- Wordpress Brute Force Protection
-
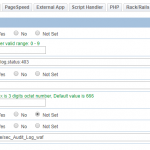
- Web Application Firewall
-

- Web Application Firewall Ruleset
-
- Per Client Throttling
-
- Access Denied Directories

-
- Access Control
